
Homemade Kidney Bean Paste without Pressure cooker

I grew up seeing the way how Filipino made a Bean Paste which is usually made up of Condensed milk to make it sweeter instead of sugar, the condensed milk gives a creamier & sweet taste and it taste really good but, because of our weather I decided not to use condensed milk this time.
In our weather (Philippines), we have this really weird weather. Sometimes, it gets cold and hot. So, we tend to adjust some of our food (good example is our Adobo and this recipe for dessert) to make it last longer without wasting it.
As far as I know any kind of food that contains milk can easily be spoiled not unless if you have the refrigerator which probably a lot of people nowadays have their own ref so it’s fine. Replace sugar to condensed milk if you prefer it.
In this recipe, I make this filling with sugar, glutinous rice flour that serves as thickener, then add salt to balance the sweetness and Kidney Beans. You can use any kind of beans you want if this is not available. All types of beans taste the same for me.
Sweet Potato can be used as well with the same ingredients here in this recipe, I tried it here and it surprisingly tastes really good which is a best filling for Buchi or Hopia.
And for sweetener, you can substitute sugar to honey but you have to adjust it according to the level of your sweet taste preference.
This Bean Paste Filling can be used as filling for Mooncakes, Hopia, Bread, Cupcake, Palitaw, Buchi (Sesame Balls), Siopao (Steamed Buns) and many more. Well, it is up to you how adventurous or creative you are :)
I do not have Pressure cooker but if you have one, the better. Since I don’t have one, I just soak this overnight, boil then manually mashed it with my strainer but luckily I was able to borrow a blender.
The blender I used in the video is from my mother’s co-teacher. Unfortunately, my blender isn’t functioning well. Thanks to her co-teacher hahahaha. My mother gave them some of the food that I made few days ago in return for letting me borrow their blender for one week (hahahaha).
So, here is the very simple recipe of our homemade kidney bean paste. I hope you try this too.
Tools needed for making this:
Pot
Non-stick pan
Blender or strainer (do it manually by straining the boiled beans)
Homemade Kidney Bean Paste
Ingredients: First Part
- 2 cups Kidney Beans
- 4 cups water (for beans to soak overnight)
- 5-6 cups water for boiling (add more if needed)
Ingredients: Second Part (Make the Bean Paste)
- 200 grams Sugar
- 1 tsp. salt
- 2 tbsps. glutinous rice flour
- 3 tbsps. water
- 1-2 tbsp vegetable oil
Instructions:
- Soak kidney beans in a basin of water overnight or 6 hours and place it in the refrigerator.

- Wash the beans and boil it in the water until soft. You can test by pinching it if it is already soft. You would know if it is already soft if you can crush it just by pinching. See the picture or the video, that’s how the beans we’re trying to get as much as possible specially if you’re using a strainer
- Set aside and cool it down a bit.
- Once cooled down, use a blender to puree it or should look like a milk shake consistency. Remove excess water if possible from the beans before blending. If you prefer thick paste then remove water, but if not then just let it be as it is. Lessen the water if it is too much. Remember we’re not making soup here :)

- Blend until it becomes smooth. I like mine to have some rough texture and something chewable.
- Set aside then transfer it to a non-stick pan. Do not cook yet.
- Dilute glutinous rice flour to water in the blender then add it to our blended beans.

- Add sugar and a pinch of salt. Don't forget to add the vegetable oil. (Thanks to @Alma Laxa for letting me know that I didn't mention vegetable oil) Mix and stir well.

- Turn on the heat to medium.
- You need to stir it constantly while cooking. It will tend to burn if you leave it behind.

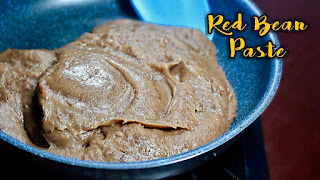
- Cook until it becomes thick or paste consistency. I cooked this over 15 minutes.
- Once done. Place it in a bowl and cover.
- You may store it in the freezer if you’re not going to use it yet and when you’re going to use it, just place it in the refrigerator to defrost.
- Done.


2 comments
Hi thanks for the recipe. I am planning to cook it this coming weekend for my family as a filling for the butchi (also your recipe) hehe..I have a question though, why do you put oil on your paste? What does it do for the paste? Thanks
ReplyDelete
ReplyDeleteread this above post its very greatful for me thanks sharing this post ,great post.
visit our website